Building Rugroom from pixels to a real-time 3D scene
A coffee table leg took more debugging than I expected. The rug looked convincing in the middle of the floor, but moving it underneath the table exposed a thin strip of incorrect pixels. That small failure ended up saying a lot about the project.
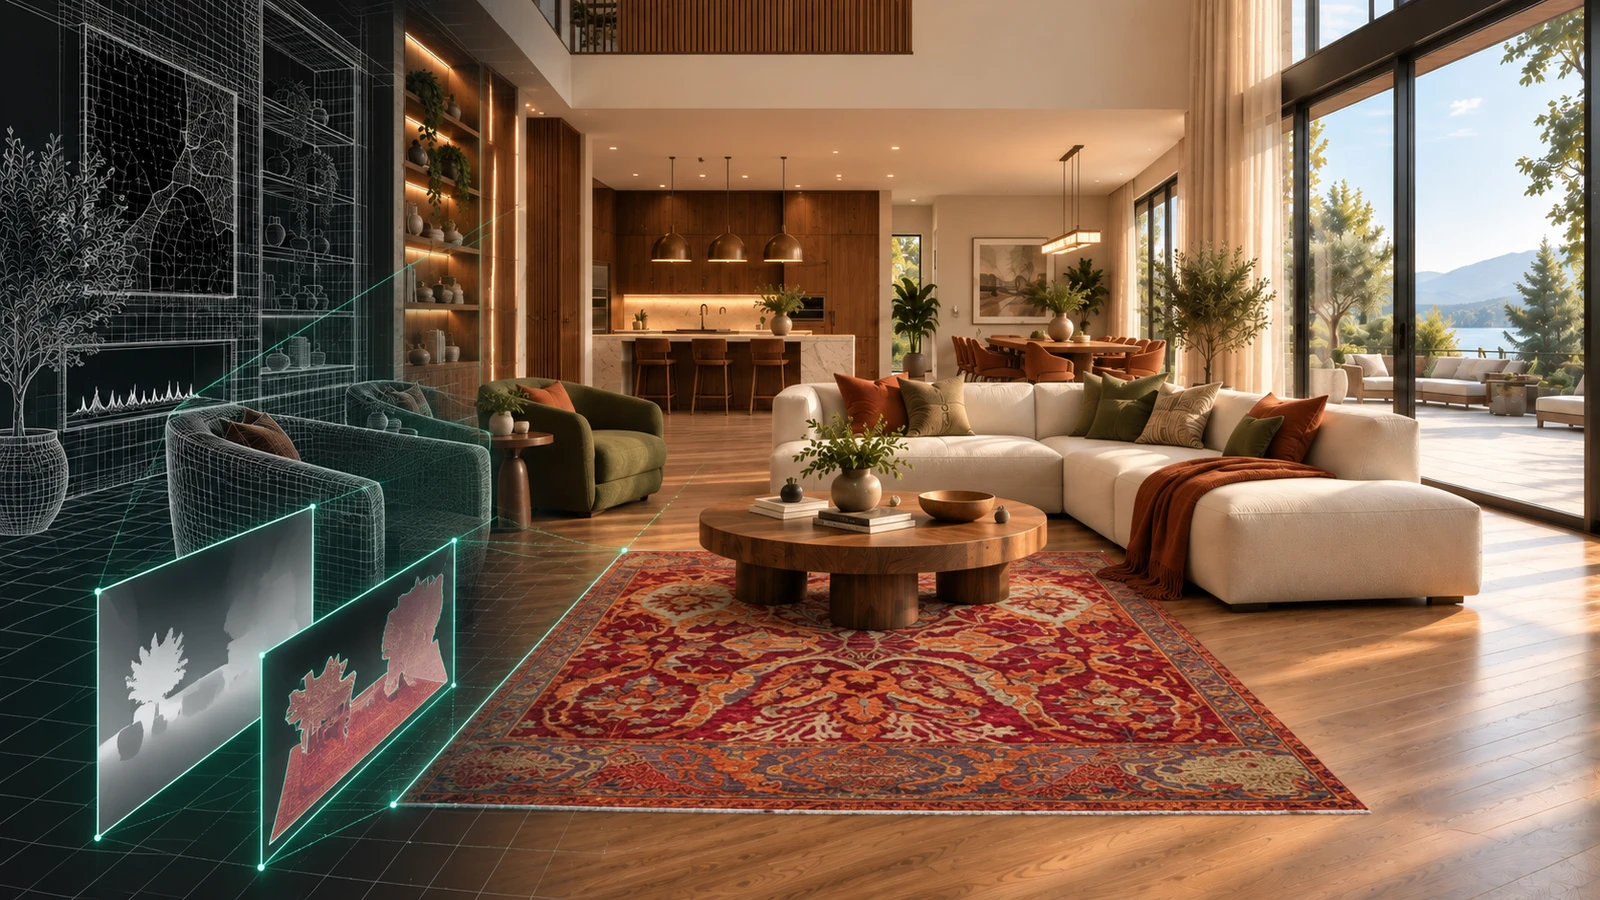
Rugroom lets someone place a rug inside a room image, move it around, rotate it and compare different placements. The visible interaction is simple. Underneath it are several systems that need to agree about the same photograph: image analysis, camera geometry, furniture visibility, lighting and a responsive browser renderer.
I built the project across Python and JavaScript. The analysis work turns pixels into scene information. The browser turns that information into something a person can interact with. Most of the difficult work happened at the boundary between those two responsibilities.
This is a development walkthrough of the decisions that mattered, the failures that helped me understand the system and the tools I used to make progress reproducible. The code samples are deliberately reduced examples of those engineering patterns. They leave out the product's model configuration, correction rules and deployment internals.
Keeping the photograph and the product intact
I wanted the selected rug to remain the selected rug. Its pattern, outline and proportions should survive the interaction. Generating a new room image on every change would make that harder to control.
I chose a hybrid scene. The room photograph provides the background. Three.js renders the rug as a mesh, with its actual product texture. Analysis supplies the information needed to place that mesh and hide the right parts of it behind furniture.
That decision made repeated interaction possible without running inference every time the user moved a rug. It also made the rendering mistakes easier to see. The photograph is already visually coherent. Anything added to it has to earn its place.
The scene is tied to the photograph's camera view. I do not reconstruct every hidden surface in the room. There is no complete model of the back of the sofa waiting outside the frame. The goal is a consistent placement experience from the view the photograph gives me.
The stack, with a job for each library
 PythonAnalysis runtime
 PyTorchModel inference
 NumPyArray processing
 OpenCVImage diagnostics
 Three.jsScene and materials
 ViteBrowser build
 JavaScriptInteraction and workers
 Node.jsAsset preparation
The visualizer itself uses JavaScript modules and Vite. React and Next.js belong to this portfolio, not the core scene runtime. Keeping that distinction clear matters when describing what I actually built.
| Layer | Tools used in this project | What I use them for |
|---|---|---|
| Scene and interaction | Three.js, WebGL, browser pointer events | Camera projection, rug meshes, materials, dragging and rotation |
| Browser computation | Web Workers, typed arrays, Canvas | Preparing image samples and computing room lighting away from the UI thread |
| Analysis runtime | Python, PyTorch, Transformers | Running the image models and inspecting their outputs |
| Image processing | NumPy, OpenCV, Pillow | Working with masks, image arrays and boundary diagnostics |
| Photo input | exifr, libheif-js | Camera metadata and a local WASM decoding path for HEIF images |
| Asset preparation | Node.js, sharp, Vite | Building smaller previews, preparing room assets and bundling the application |
| Persistence | IndexedDB, server-side job records and object storage | Reopening rooms and preserving accepted analysis work |
| Export and testing | jsPDF, qrcode, Puppeteer, Node assertions | Exporting the scene and checking real browser interactions |
The libraries handle useful pieces. My work is in how those pieces agree on dimensions, coordinate systems, ownership and lifecycle. A valid tensor and a valid texture can still produce an incorrect image when their assumptions differ.
Two paths through the architecture
A new photograph and a prepared room should not take the same route through the system. A new photo needs analysis. A prepared room should reuse the work already done.

Analysis runs once for a new result. Subsequent dragging and rotation use the browser renderer.
The diagram shows the main responsibilities rather than every internal service. The distinction between the two paths is also how I think about performance. Model inference belongs to preparing a scene. Moving a rug belongs to interacting with that scene.
On the server, accepting a job, running it and delivering its result are separate events. In the browser, receiving that result and applying it to the currently selected room are separate events too. Treating all of them as one long request made failures much harder to reason about.
Defining the boundary between Python and the browser
A segmentation result is useful, but it is not yet a scene. The browser also needs to know which image the result belongs to, how large that image is and how its geometry should be interpreted.
I keep the photo and its analysis associated with the version that produced them. That lets me reopen an old result honestly. A change to the renderer should not make an earlier model run appear to have come from a newer pipeline.
This is a reduced type sketch of that boundary. The actual application uses JavaScript, and its production payload has additional fields. TypeScript is useful here because it makes the relationship between values visible.
Illustrative scene contract
type AnalyzedRoom = {
  photoHash: string
  analysisVersion: string
  imageSize: [width: number, height: number]
  masks: {
    floor: string
    furniture: string
  }
  camera: {
    focalPx: number
  }
  floorPlane: [a: number, b: number, c: number, d: number]
}
The image dimensions are particularly important. A mask at one resolution, a focal length expressed at another resolution and a texture uploaded with a different orientation can all be individually valid. Combining them without an explicit conversion gives you a scene that looks almost right and fails around the edges.
On the Python side, I use PyTorch for inference and array-based processing for the outputs. I inspect intermediate masks and geometry instead of treating the model call as an opaque success or failure. Model loading order and memory use also became part of the work, especially while running several large models locally.
The following shows the inference boundary in isolation. model, preprocess and image are supplied by the caller. It is not the project's model recipe.
Illustrative inference boundary
import torch

def run_inference(model, preprocess, image, device):
    model.eval()
    inputs = preprocess(image).to(device)

    with torch.inference_mode():
        output = model(inputs)

    return output
The important application decision is what happens around that call: how inputs are normalized, which intermediate outputs are retained and how failures are reported. A successful inference call does not prove that the resulting room can support a convincing placement.
Why a floor mask was only the beginning
My first useful decomposition was to separate three questions. Which pixels look like floor? Where are the objects? How do the visible surfaces sit relative to the camera?
Those answers can disagree. A chair may have a correctly identified seat and a missing leg. A broad furniture region may cover the real floor visible through a metal frame. A dark area may be a shadow, a piece of fabric or an opening underneath a sofa.
For rug placement, both kinds of error are visible. Missing furniture pixels let the rug paint over an object. Extra furniture pixels remove pieces of the rug where nothing should be hiding it.
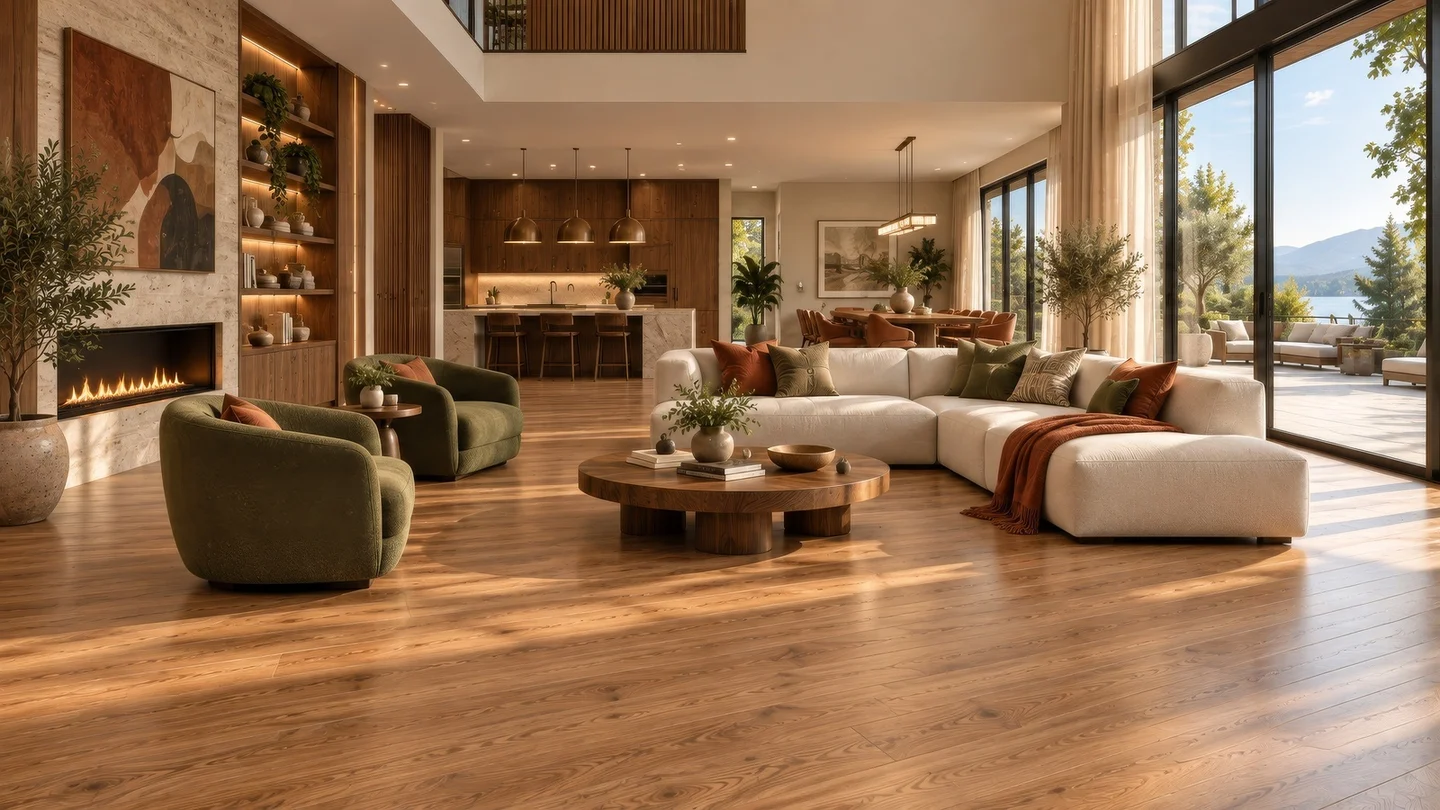
The source image. Look at the coffee table legs, sofa edges and visible floor openings.
The saved floor and object masks let me inspect what the analysis actually returned before looking at the final render. They are intermediate outputs from the reviewed terrace room, not illustrations generated for this article.
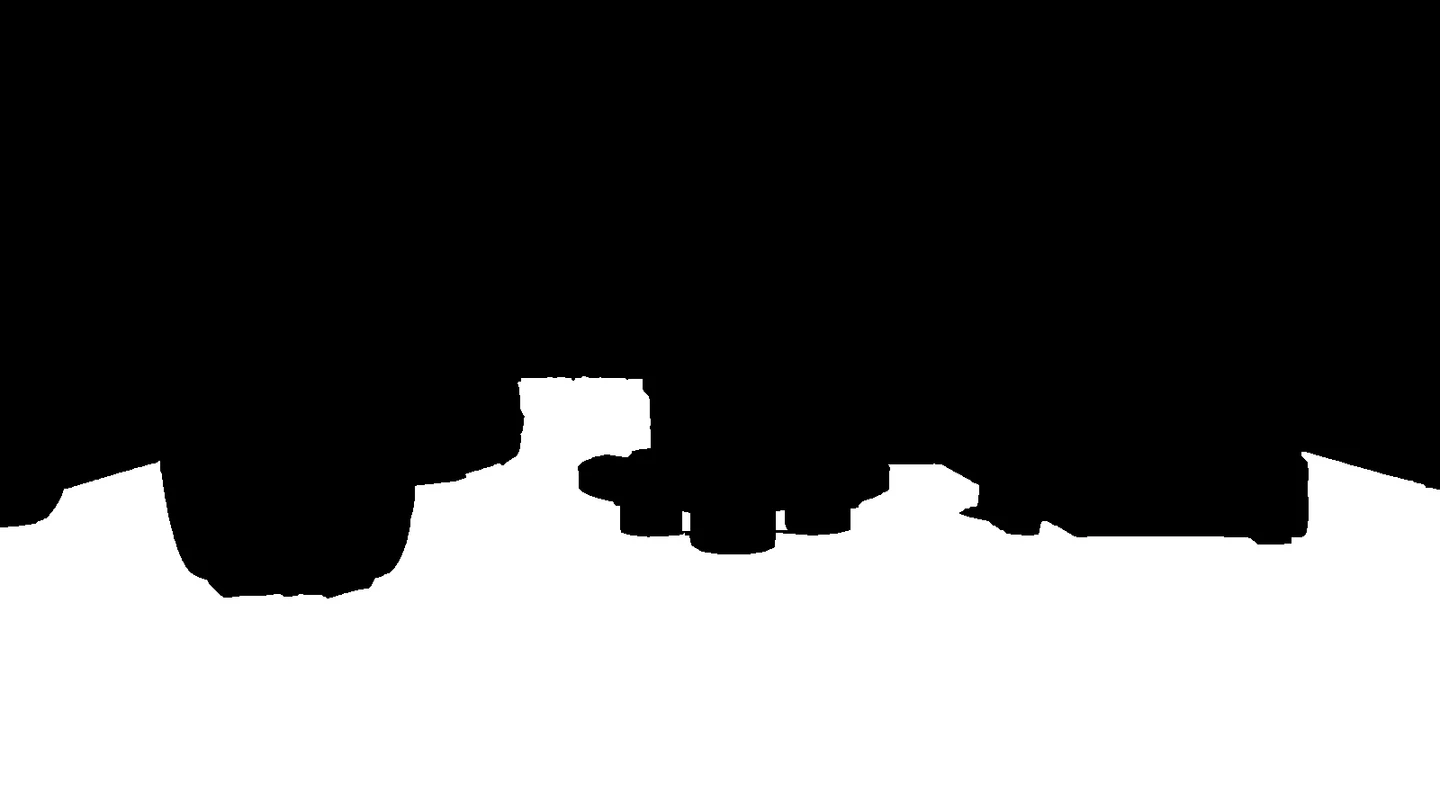
The saved floor-region output before browser composition. This is an actual development artifact.
I started describing failures by location and behavior. “The gap on the right of this table leg closes when the rug moves underneath it” was much more useful than “the mask needs improvement.” It gave me a specific observation to reproduce after a change.
For prepared rooms, I also reviewed selected boundaries against the source image. I kept those authored corrections separate from automatic model outputs. A carefully reviewed room is useful for a live demonstration, but it should not be counted as proof that every unseen image will work equally well.
The most useful quality comparisons kept the source photograph next to both results. In one review, I examined ten selected regions across three room images using two analysis flows. Some differences were concrete: a raised fireplace step remained in front of the rug in one result, while the other allowed the rug to cover it. Around a sofa and footstool, both flows preserved the main objects, and the differences were subtler.
I did not turn that small review into a global accuracy percentage. Nor did I use similarity to an older mask as the final definition of quality. The photograph was the reference I needed to explain the visible failure.
Reviewing development iterations on the image
I kept intermediate scene captures while working on boundaries and floor placement. That made it possible to return to a visible failure instead of relying on memory of how an earlier version looked.
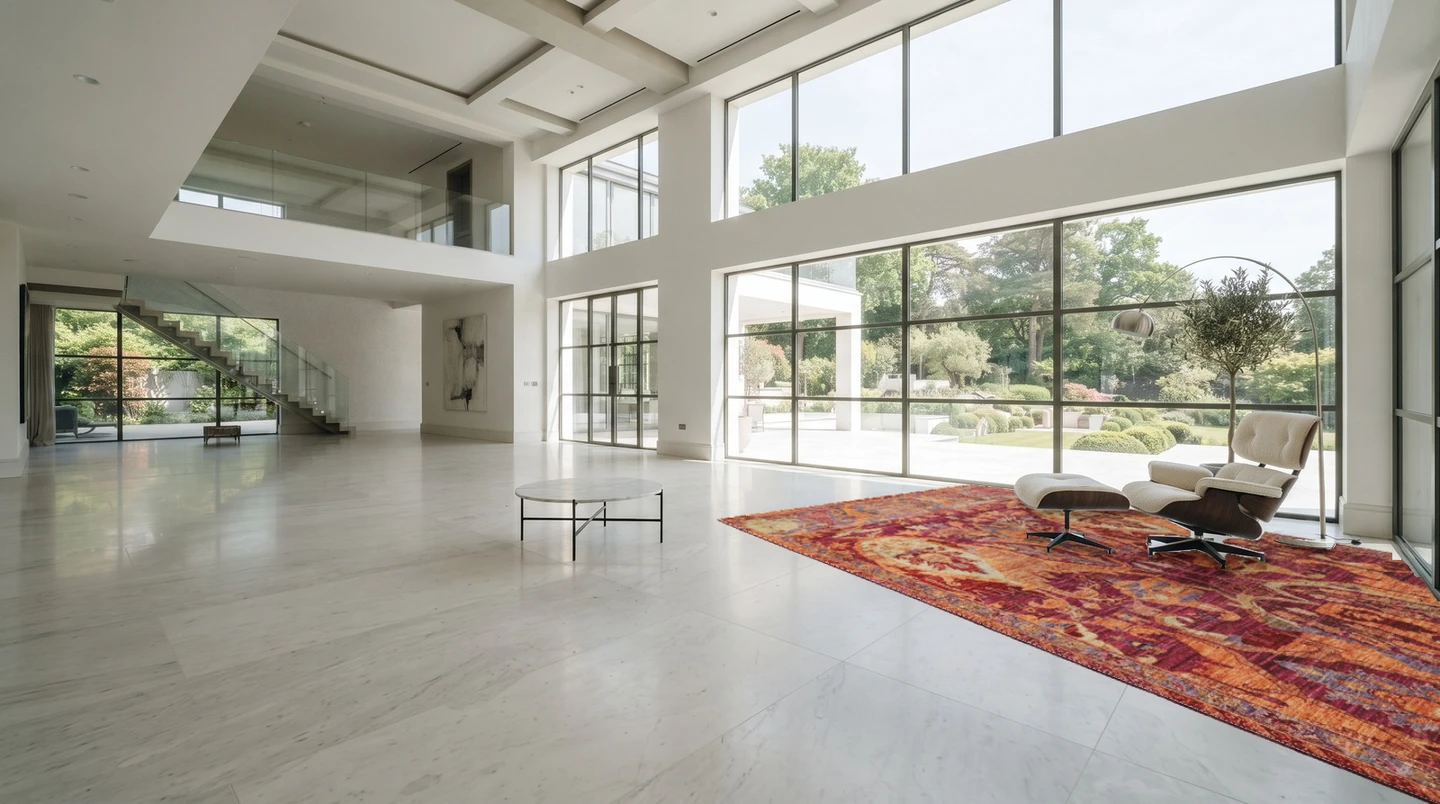
Earlier recorded review. Inspect the chair base and the rug near the glass wall. Both geometry and visibility affect this frame.
These are two saved iterations of the same room review. Look at the chair base, the floor beside the glass wall and how the rug reaches those regions. The placement also changes between the frames, so this is a development comparison of the resulting scene rather than an isolated segmentation benchmark. The underlying source image is the same.
Getting from a pointer to the floor
Dragging feels simple because the cursor is on a flat screen. The rug, however, has a position on a plane in the scene. I need to translate between those spaces without quietly changing the rug's physical footprint.
A useful starting point is to normalize the pointer relative to the renderer's visible rectangle, construct a camera ray and intersect that ray with the floor plane. Three.js exposes the camera-ray step through Raycaster.setFromCamera.
Reduced pointer-to-plane example
import { Raycaster, Vector2, Vector3 } from 'three'

const raycaster = new Raycaster()
const pointer = new Vector2()
const hit = new Vector3()

function pointerOnFloor(event, canvas, camera, floorPlane) {
  const rect = canvas.getBoundingClientRect()
  if (!rect.width || !rect.height) return null

  pointer.set(
    ((event.clientX - rect.left) / rect.width) * 2 - 1,
    1 - ((event.clientY - rect.top) / rect.height) * 2
  )

  raycaster.setFromCamera(pointer, camera)
  return raycaster.ray.intersectPlane(floorPlane, hit)
}
This sample assumes the displayed image and camera viewport are already aligned. The application also deals with the photograph's fit, visible floor constraints and the offset between the pointer and the grabbed point. Those details are what keep a rug from jumping when a drag begins.
I use quarter turns as a practical geometry check. Rotating a rug should preserve its physical dimensions and floor contact. It should not change size because a screen-space bounding box changed shape.
I also had to check the same relationships after CSS zoom, viewport changes and different device pixel ratios. Pointer coordinates arrive in CSS pixels. The drawing buffer may have a different resolution. The photograph and masks have their own dimensions again. Much of the debugging was about making those conversions explicit.
Depth estimated from a single photograph is still an estimate. These checks establish consistency inside the scene. Without measured room references, they do not establish centimetre accuracy in the real room.
Lighting belongs to the room
Once the perspective and furniture boundaries looked better, the rug still looked too independent of its surroundings. The room had window light, warm surfaces and shadows. The added material looked as though it had arrived with its own lighting.
I built a lighting path that uses visible floor samples and contact information from the photograph. The difficult part is separating illumination from appearance. Wood grain and an existing rug pattern should not become a new pattern projected onto the selected product.
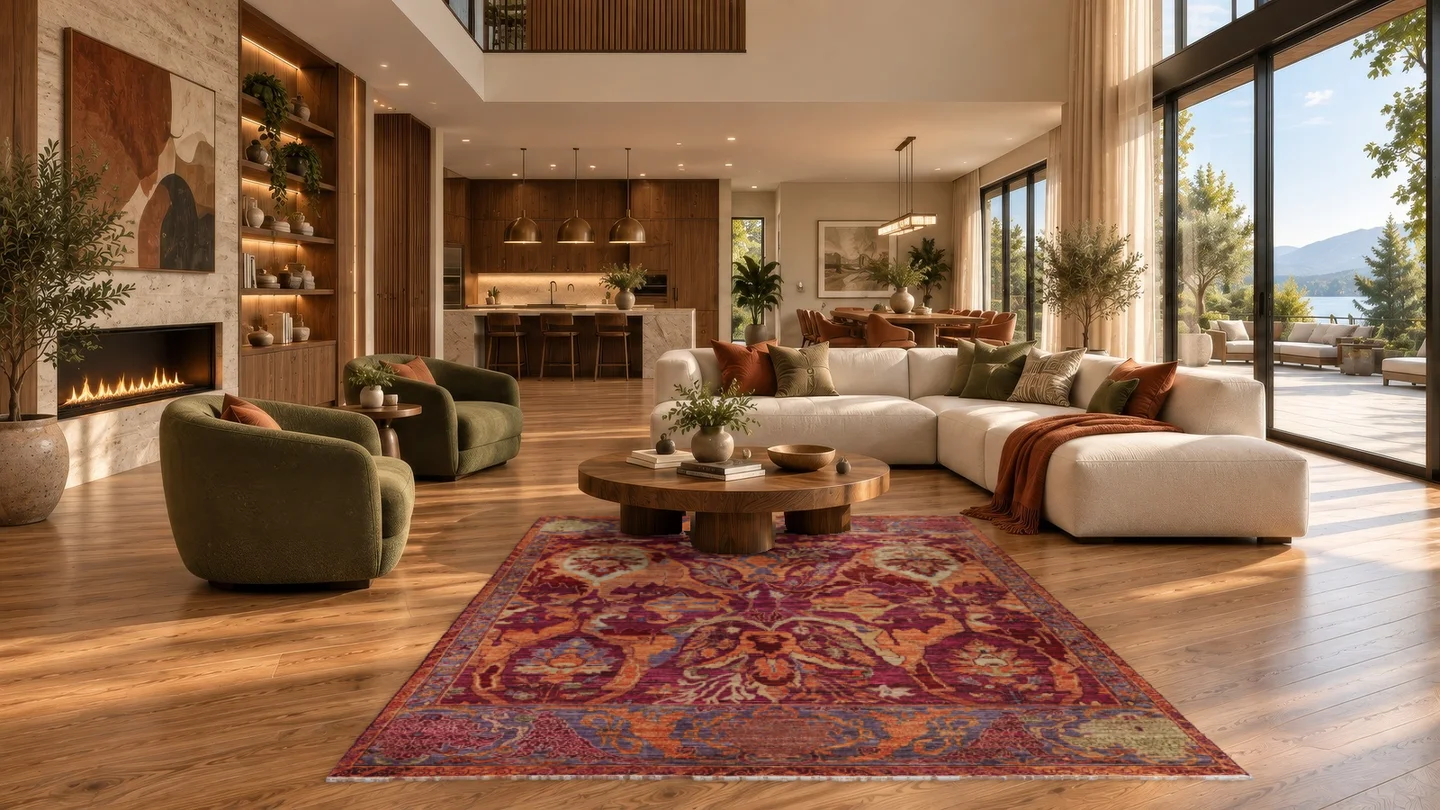
Room lighting enabled. Compare the rug around the coffee table and the lower edge of the sofa.
These two images come from the same development review. The source room and placement are held constant. Switching the lighting contribution makes the relationship around the coffee table and sofa easier to inspect.
The lighting field also needs to remain registered to the photograph. When a user drags the rug into a darker part of the room, the darker region should stay in the room. Attaching that field to the rug's own texture coordinates would move it with the product.
Single-view lighting is an approximation. I cannot recover every light source or hidden object surface. I can, however, keep the effect consistent with the parts of the photograph I can observe, and apply it through the same material path used by the main rug, comparisons and exports.
Moving image work off the UI thread
The lighting calculation runs in a browser worker. That keeps the computation away from the thread handling controls and scene interaction. The worker receives image samples and returns a typed array that the renderer can use.
The small messaging boundary is worth showing. This reduced version follows the worker pattern used in the project, with the estimator left out.
A reduced worker boundary
const worker = new Worker(
  new URL('./lighting.worker.js', import.meta.url),
  { type: 'module' }
)

// A temporary buffer owned by this calculation
worker.postMessage(
  { pixels, width, height },
  [pixels.buffer]
)
The transfer list changes ownership of the underlying buffer. The sending side cannot continue to use it as before. I use temporary arrays at this boundary so transferring them does not invalidate a buffer still needed by the scene. The ownership behavior is described in MDN's transferable objects documentation.
The other half of the problem is lifecycle. A result may arrive after the user has selected another room. Applying a perfectly valid lighting result to the wrong photograph is still a rendering bug.
Reduced stale-result guard
let activeRoom = null

async function activateRoom(room) {
  activeRoom = room
  const result = await prepareLighting(room)

  if (activeRoom !== room) return
  applyLighting(result)
}
This captures the identity check. The full application also cancels pending work, applies timeouts, terminates workers and disposes of replaced GPU textures. The guard protects scene correctness. Cleanup protects the resources used to produce it. I needed both.
Making fabric movement behave under furniture
A rug that slides like a rigid board looks wrong. A rug that waves freely underneath a sofa also looks wrong. I wanted a small material response that stayed connected to the placement constraints.
I added bounded surface movement driven by dragging and rotation. It settles back to rest after interaction. Areas estimated to be under furniture remain constrained, and the woven edge follows the primary mesh.
I think of this as contact-aware visual behavior. It is not a full simulation of woven cloth and hidden furniture geometry. That scope helped me choose what to test: grounded contacts, bounded displacement, stable dimensions and a surface that actually returns to rest.
Frame rate also matters. A motion update that applies a fixed fraction per frame can feel different on different devices. Using elapsed time in the response is part of keeping the interaction consistent.
Here is the kind of invariant I care about, shown as a reduced Node test. The helper names are illustrative. In the project, these checks live alongside tests for motion, screen geometry and contact behavior.
Illustrative motion invariants
import assert from 'node:assert/strict'

const result = simulateDragAndRelease({
  durationSeconds: 3,
  framesPerSecond: 60
})

assert(result.minimumHeight >= 0)
assert.equal(result.contactDisplacement, 0)
assert.equal(result.finalEnergy, 0)
assert.deepEqual(result.finalSize, result.initialSize)
A screenshot would not tell me whether the motion depends on frame rate or whether the rug eventually settles. Conversely, a passing numerical check would not tell me whether the edge looks detached. I use both kinds of evidence.
Saving analysis so I can debug the renderer
Running the entire analysis pipeline after every shader or interaction change made the feedback loop unnecessarily slow. It also introduced another moving part when I was trying to isolate a visual difference.
I built a replay workflow around saved photographs and their analysis outputs. I can reopen a room, place the same rug at a known location and inspect the change without starting new inference. This became one of the most useful development tools in the project.
For prepared rooms, I package the reviewed background, visibility information, lighting atlas and placement data ahead of time. Opening those rooms does not require segmentation, depth inference or a new lighting calculation.
An early September browser record measured the first prepared-room opening at about 2.2 seconds. The next three room switches were 309, 163 and 142 milliseconds. These are measurements from one local development run, not current production latency guarantees. They helped me verify the value of keeping scene preparation out of the repeated interaction path.
IndexedDB stores rooms locally so reopening a saved room can reuse its existing result. A saved result retains its actual analysis version. A newer renderer does not silently claim that an older photograph has been analyzed by a newer model.
Removing repeated computation before changing the model
One of the more useful optimizations was inside the image analysis path. Several requests needed information from the same image or crop. Running the visual feature extraction again for each request repeated work that did not depend on the later query.
I introduced image-feature reuse inside a single analysis. The cache belongs to the image being processed and is invalidated when that input changes. This is different from returning a previously completed room analysis. The model still performs the work needed for the current photo, but avoids recomputing identical visual features.
In a paired local Apple MPS run, the mask stage went from 32.647 seconds to 27.011 seconds, a 17.26% reduction. The recorded image-backbone passes dropped from nine to four, with five reuse hits. The compared masks matched, with a recorded IoU of 1.0 for the paired check.
This was a useful win because it removed duplicate computation while preserving the tested result. It was not a CUDA measurement, and I did not assume the same percentage would apply to a complete server request. The other two recorded mask runs were 28.203 and 28.232 seconds, but they were different rooms, not additional before-and-after pairs.
A simplified version of the idea looks like this. The cache is created for one image and lives only as long as that analysis. The real implementation also handles crop identity and the model-specific feature structure.
Illustrative per-image feature reuse
def analyze_queries(image, queries, encoder, head):
    features = encoder(image)
    return [head(features, query) for query in queries]
The difficult part was proving that the reuse boundary was valid. If a query changes the image-side computation, or a cache accidentally survives a change of photo, the speed improvement comes with an incorrect result. That is why I kept output comparison next to the timing measurement.
RAM optimization by bounding intermediate tensors
A high-resolution semantic output can consume much more memory than its final mask. The intermediate array contains a score for every class at every pixel. Expanding that entire array and then applying a reduction creates a large temporary working set.
I changed the postprocessing path to interpolate and reduce the scores in horizontal stripes while keeping the final output resolution. The stripe budget limits how much intermediate data needs to be live at once. The output arrays are still full-size.
The arithmetic makes the issue visible. A single FP32 array with 150 classes at 1600 × 900 pixels occupies about 824 MiB. A 32-row intermediate at the same width occupies about 29.3 MiB. Those are calculated sizes for one array, not measurements of the whole process or a claim that the entire application uses 29 MiB.
To measure the effect separately from model loading, I ran the existing whole-image and striped postprocessing paths in separate Python processes. Both received the same seeded synthetic logits, produced a 640 × 360 output and used two CPU threads. This run does not load a model or allocate GPU tensors.
Peak process RSS was 496.86 MiB for the whole-image path and 224.47 MiB for the bounded path, roughly 55% lower in this run. The measured calculation times were 0.222 and 0.226 seconds. The point of this change was the working set, and the small timing difference does not establish a speed improvement.
The existing regression compares interpolated probabilities and confident labels against the former whole-image calculation. It also checks the maximum intermediate allocation, including image widths and stripe boundaries that can reveal indexing mistakes.
Measured CPU microbenchmark and regression summary
Input              seeded synthetic logits
Output             640 x 360, 150 classes
CPU threads        2
Whole-image RSS    496.86 MiB
Striped RSS        224.47 MiB
Whole-image time   0.222 s
Striped time       0.226 s

PASS semantic probabilities and confident labels match
PASS intermediate allocation remains within the stripe budget
The regression lines above summarize the test output. The numbers come from separate process measurements. On the server, a configured RAM reservation is a different quantity again. The recorded L4 setup reserved 16 GiB of host memory, but that setting is not evidence that the process consumed 16 GiB, and it is not GPU VRAM. I do not have a matching full-inference VRAM peak measurement in this comparison.
Making GPU startup cheaper in work, not just choosing a faster GPU
A fast model does not make a fast first request if the process spends most of its time importing libraries, constructing models and loading weights. My early measurements made that distinction hard to ignore.
I split initialization into CPU preparation and GPU attachment. The model objects can be prepared in host memory and captured in a process snapshot. After restore, they are moved to the device before inference. This is the CPU-memory snapshot pattern described in Modal's snapshot documentation.
The implementation preserved the analysis configuration used for the comparison. I did not get the reported improvement by reducing the mask resolution or switching the segmentation models to a lower precision. The model preparation and device-transfer lifecycle changed.
The earlier T4 request took 62.07 seconds. Two independent CPU-snapshot restores returned in 34.20 and 43.46 seconds. That is an observed reduction of about 30% to 45% for those runs. Creating the first snapshot still took 94.27 seconds. Initialization work moved into a reusable stage, rather than disappearing.
Across the three reviewed T4 rooms, the restored outputs matched the previous masks, depth, focal value and detections. That gave me evidence that this startup change preserved the compared outputs.
L4 showed why hardware and initialization need separate measurements. A normal first L4 request took 70.41 seconds, even though the next request on the warm process took 16.91 seconds. Two later L4 CPU-snapshot restores of the same room took 18.33 and 42.20 seconds, with recorded device attachment of 1.06 and 1.98 seconds. The remaining wall time includes analysis and service overhead, not just copying weights.
I also recorded cases where the provider created an additional snapshot. Those requests belong in a different category from a clean restore. The fastest observation is useful for investigation, but it is not an honest replacement for the full set of observations.
Concurrency without mixing image state
Scaling the worker pool introduced another constraint. Some of the image-analysis state belongs to the current photograph. Allowing two photos to mutate the same resident predictor concurrently risks mixing their features or masks.
I kept one active photo analysis per GPU worker and used a bounded pool for parallel work. Durable jobs provide the queue, while the GPU workers run the expensive stages. CPU geometry and result delivery remain separate parts of the path.
In a recorded cold-start experiment, 20 distinct photographs were submitted together through the HTTP gateway. The GPU pool started at zero and reached four concurrent analyses. All 20 requests completed, with exactly 20 model submissions and no preparation calls.
The first result arrived in 63.36 seconds, the median in 101.84 seconds and the last in 141.75 seconds. These are one burst experiment, not a production latency guarantee. Three previously reviewed rooms matched their earlier L4 outputs. Completion of the other 17 jobs establishes that their packages passed the checks used in this run, not that every visible boundary was manually approved.
A separate gateway check also showed why duplicate work must be stopped before the model call. Eight preparation requests coalesced into one preparation operation. A new analysis, including CPU geometry and polling after upload, took 28.462 seconds. Re-uploading the same photo returned the existing job and result in 0.217 seconds, without a new GPU analysis.
That last number is a cache retrieval measurement. Presenting it as inference speed would hide the most important thing about the optimization: the inference did not run again.
Download the benchmark measurements shown here. The published file contains only the selected measurements and their scope, without service keys, job identities or raw private analysis packages.
Long-running jobs need more than a loading spinner
The server-side work needed similar discipline. An accepted analysis job should not disappear because a browser disconnected. A result delivery retry should not mean running the models again.
I separated durable job state from the lifetime of an individual request. The system records work that has been accepted, controls permission to execute it and handles repeated result delivery as the same logical operation.
There is an important tradeoff when a submission becomes ambiguous. If I cannot establish whether work already started, blindly retrying may execute it twice. Some uncertain jobs are deliberately left in an explicit unresolved state instead. That is a more honest outcome than pretending every network timeout means nothing happened.
I keep those concerns behind the analysis boundary. The browser needs understandable progress and a reusable result. It does not need the service credentials or the internal model layout.
The unglamorous browser work mattered too
Photo handling produced failures before analysis even began. A file picker can provide a usable image with an empty MIME type. HEIF support varies by decoding path. Orientation metadata can change which way the pixels need to face.
I consolidated photo preparation so the desktop and phone entry points use the same behavior. exifr reads the relevant camera metadata, and libheif-js supplies a locally bundled WASM fallback when native decoding is unavailable. Invalid files have a visible failure path rather than disappearing after selection.
The phone handoff also has several states: connecting, uploading and letting the desktop open the result. Generating a QR code only solves the address exchange. Recovery after an initial connection failure is a different part of the feature.
For the catalogue, I generate smaller previews with sharp instead of sending full scene textures to tiny cards. A product image used for rendering and the thumbnail used to choose it have different jobs. I also avoid fetching desktop hover images on a phone where that interaction is unavailable.
Exports have to use the same scene interpretation. I use jsPDF for document generation and qrcode for the handoff links, but the hard part is retaining the camera, lighting and visibility behavior in the exported result. A correct browser view is not enough if the downloaded image changes the placement.
Testing the failures I actually saw
I use Node assertions for deterministic geometry and motion checks, and Puppeteer for the parts that need a real browser. That includes pointer dragging, repeated rotation, changing rooms, mobile layouts and export behavior.
The visual checks are built around recorded problem areas. I keep the source photo, analysis revision, placement and comparison images together. When changing a boundary rule, I can return to the regions that previously worked as well as the one I am trying to fix.
One useful review pattern is to compare both versions through the current renderer. That reduces the chance of crediting a mask change for an unrelated lighting change. When two full analysis flows produce different geometry or lighting inputs, I also record that limitation rather than calling it a controlled model comparison.
The tests have caught issues outside image analysis too. Repeated quarter turns exposed geometry inconsistencies. Room switching exposed stale asynchronous work. Mobile photo fixtures exposed decoding and orientation problems. Export checks exposed assumptions that were only true in the visible canvas.
This is where the project became much more satisfying to work on. I could make a change, explain which behavior it was supposed to affect and produce evidence of what actually happened.
What I built, beyond the final screenshot
Rugroom brought together work that I usually encounter in separate projects: Python inference, image diagnostics, 3D geometry, shader integration, browser resource management and durable asynchronous jobs.
The part I am proudest of is being able to trace a visible failure through those layers. A bad edge may come from a mask. It may also come from a coordinate conversion, an alpha channel, an incorrectly registered lighting texture or a result arriving for a room that is no longer active.
I can now separate more of those causes, replay the relevant state and test the behavior that changed. The final screenshot matters, but being able to reproduce and explain it is the engineering result I value most.
Explore Rugroom